Updating Dragonfly
All Dragonfly customers receive notification of new software releases, which contain new features, performance improvements, bug fixes, and other important changes.
Commercial users must have a valid Maintenance and Support plan to be eligible for a new version. Non-commercial users must have a current non-commercial license.
-
Log onto the client computer with administrator privileges, recommended.
- Double-click the Dragonfly installer you downloaded. For example,
InstallDragonfly3DWorld_1627.exe.Note If the User Account Control dialog appears, you may need to enter an admin username and password to allow the program to make changes to your computer.
The Dragonfly Setup Wizard appears.
- Click Next to begin the update.

The License Agreement screen appears.
- Review the license agreement, and, if you accept the terms, click I Agree to continue.
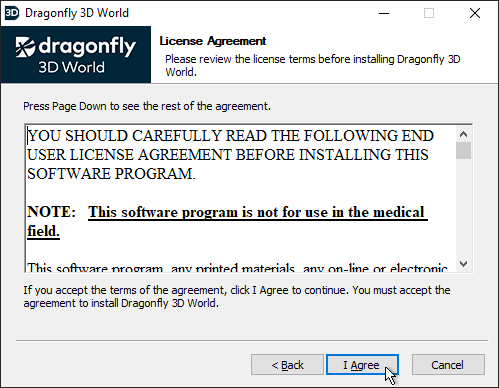
Note You cannot update the program without first accepting the license agreement.
The Install Dragonfly screen appears.
- Do one of the following:
- Select Overwrite existing installation if want to simply update the current version of Dragonfly.
- Select Overwrite another existing installation if you have multiple instances of Dragonfly and you want to overwrite one of those versions. You can enter the path to the installation folder of the version you want to overwrite or you can click Browse and then choose the folder in the Browse For Folder dialog.
- Click Update to continue.

Wait for the update to be completed and the Installation Complete screen to appear.
- Review the installation summary, recommended, and then click Next on the Installation Complete screen.

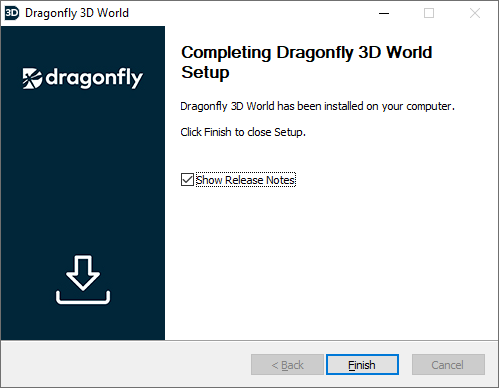
The Completing Dragonfly Setup screen appears.
- Do the following, as required.
- Check Show Release Notes, optional. If checked, the release notes for the installed version will appear in Adobe Acrobat Reader.
- Click Finish to complete the setup of your new version of Dragonfly.